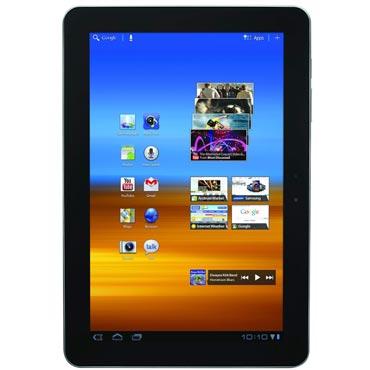
Android : Android Galaxy Mini Dibanderol Rp 1,6 Juta

Thursday, August 18, 2011 Labels:


Android : Android Galaxy Mini Dibanderol Rp 1,6 Juta

Telkomsel bersama Samsung meluncurkan paket bundling smartphone berbasis Android, Samsung Galaxy Mini. Paket smartphone seri S5570 yang sudah dilengkapi kartu perdana Simpati ini dibanderol seharga Rp 1.599.000.

VP Channel Management Telkomsel Gideon Edie Purnomo berharap paket Samsung Galaxy Mini Telkomsel ini bisa membuat layanan berbasis Android ini bisa dinikmati masyarakat dengan harga terjangkau.

"Ini merupakan salah satu upaya kami dalam menyediakan solusi layanan mobile lifestyle berkualitas dengan harga yang semakin terjangkau, khususnya bagi kawula muda yang selalu mengikuti tren perkembangan teknologi terbaru," ujarnya di Jakarta, Sabtu (19/2/2011).

Pasar pengguna smartphone berbasis Android di Indonesia meningkat secara signifikan dalam kurun waktu satu tahun terakhir. Pada tahun 2010, Android menempati posisi ketiga sebagai sistim operasi smartphone yang paling banyak digunakan dengan tingkat pertumbuhan pengguna lebih dari 200 kali lipat dibandingkan 2009.

Yoo-young Kim, Managing Director PT Samsung Electronics Indonesia, melihat perkembangan smartphone Android tidak hanya di kalangan profesional namun juga bagi anak muda. Anak muda dinilai sebagai pasar yang tepat karena memiliki semangat ingin mencoba pengalaman baru.

"Melalui Samsung Galaxy Mini dengan sistem operasi Android Froyo, anak muda dapat menikmati pengalaman menyenangkan dengan berbagai macam aplikasi dan social hub yang telah terintegrasi sehingga memungkinkan mereka memilih cara berhubungan dengan sahabat dan keluarga," ucapnya.

"Bersama Telkomsel, kami ingin memberikan manfaat lebih agar anak muda dapat lebih leluasa menikmati pengalaman bersama Samsung Galaxy Mini," pungkas Yoo-young Kim.

Samsung Galaxy Mini merupakan smartphone dengan desain trendi yang memanfaatkan sistem operasi Android 2.2 Froyo, didukung prosesor berkecepatan 600 MHz.

Smartphone dengan layar sentuh berukuran 3,14 inci ini menyediakan berbagai fitur, seperti memori internal 160 MB, kamera 3 megapiksel, radio FM, bluetooth, GPS, konektivitas 3G yang sudah mendukung HSDPA, serta slot microSD berkapasitas hingga 32 GB, dan Wi-Fi.

Paket Samsung Galaxy Mini Telkomsel memberikan penawaran layanan akses internet unlimited TelkomselFlash seharga Rp 50.000 perbulan yang bisa digunakan untuk browsing, email, chatting, dan social networking.

"Untuk mendapatkan paket tersebut, pelanggan cukup menghubungi *253*557# atau mengirimkan SMS, ketik ULMINI, kirim ke 3636," jelas Gideon.

Paket bundling Samsung Galaxy Mini Telkomsel ini mulai dipasarkan di lebih dari 50 gerai ponsel berlogo Samsung di Jakarta, Bandung, Medan, Pekanbaru, Padang, Palembang, Bandar Lampung, Batam, Banjarmasin, Pontianak, Balikpapan, Samarinda, Makassar, Kendari, Palu, dan Manado.

Saat berlangsungnya pameran penjualan di Plaza EX, Jakarta, 19 Februari 2011, pelajar dan mahasiswa bisa memperoleh harga spesial Rp 1.299.000, cukup dengan menunjukkan kartu pelajar atau kartu mahasiswa ketika melakukan transaksi pembelian.

Untuk mendukung kenyamanan pelanggan saat menikmati berbagai aplikasi Android dalam Samsung Galaxy Mini, Telkomsel telah menyiapkan jaringan broadband yang didukung lebih dari 37.000 Base Transceiver Station (BTS) termasuk 8.000 Node B (BTS 3G) di seluruh Indonesia.

Tags : Android : Android Galaxy Mini Dibanderol Rp 1,6 Juta, Android, Android Galaxy Mini
Read More >>

Android : Customizing the Action Bar

Labels:

Android : Customizing the Action Bar

[This post is by Nick Butcher, an Android engineer who notices small imperfections, and they annoy him. — Tim Bray]
Since the introduction of the Action Bar design pattern, many applications have adopted it as a way to provide easy access to common actions. In Android 3.0 (or Honeycomb to its friends) this pattern has been baked in as the default navigation paradigm and extended to take advantage of the extra real-estate available on tablets. By using the Action Bar in your Honeycomb-targeted apps, you'll give your users a familiar way to interact with your application. Also, your app will be better prepared to scale across the range of Android devices that will be arriving starting in the Honeycomb era.


Just because Action Bars are familiar, doesn’t mean that they have to be identical! The following code samples and accompanying project demonstrate how to style the Action Bar to match your application’s branding. I’ll demonstrate how to take Honeycomb’s Holo.Light theme and customise it to match this blog’s colour scheme.

Icon

This step is easy; I’ll use the wonderful Android Asset Studio to create an icon in my chosen colour scheme. For extra credit, I’ll use this image as a starting point to create a more branded logo.

Navigation

Next up, the navigation section of the Action Bar operates in three different modes; I’ll tackle each of these in turn.

Standard

The Action Bar’s standard navigation mode simply displays the title of the activity. This doesn’t require any styling... next!

List

To the left, a standard list drop-down; to the right, the effect we want to achieve.

The default styling in list navigation mode has a blue colour scheme. This is evident when touching the collapsed control in both the top bar, and the selection highlight in the expanded list. We can theme this element by overriding android:actionDropDownStyle with a custom style to implement our colour scheme:
The above uses a combination of state list drawables and 9 patch images to style the collapsed spinner, the top bar of the expanded list and sets the highlight colour when picking an item.

Tabs

Here are the before-and-after shots on the tab navigation control:

The tab navigation control uses the standard blue colouring. We can apply a custom style to android:actionBarTabStyle to set our own custom drawable that uses our desired palette:

Actions

Before-and-after on the individual items in the Action Bar:

The individual action items inherit the default blue background when selected. We can customise this behaviour by overridingandroid:selectableItemBackground and setting a shape drawable with our desired colouring:
@drawable/ad_selectable_background
The overflow menu also needs some attention as when expanded it shows a blue bar at the top of the list. We can override android:popupMenuStyle and set a custom drawable (in fact the very same drawable we previously used for list navigation) for the top of the overflow menu:
 
Selecting items within the overflow menu also show the default selection colour. We can set our customised selection colour by overridingandroid:dropDownListViewStyle:
 
These changes gets us most of the way there but it’s attention to detail that makes an app. Check boxes and radio buttons within menu items in the overflow section are still using the default assets which have a blue highlight. Let’s override them to fit in with our theme:
@drawable/ad_btn_check_holo_light @drawable/ad_btn_radio_holo_light
  

Background

I’ve left the background transparent as inheriting form Holo.Light works well for our desired palette. If you’d like to customise it you easily override theandroid:background item on the android:actionBarStyle style:

Bringing it all together

Putting all of these components together we can create a custom style:
We can then apply this style to either an individual activity or to the entire application:
 
Note that some of the system styles that we have overridden in this example will affect much more than the Action Bar. For example overriding android:selectableItemBackground will effect many widgets which support a selectable state. This is useful for styling your entire application but be sure to test that your customisations are applied consistently throughout.

Familiar but styled

Customising the action bar is a great way to extend your application’s branding to the standard control components. With this power, as they say, comes great responsibility. When customising the user interface you must take great care to ensure that your application remains legible and navigable. In particular, watch out for highlight colours which contrast poorly with text and provide drawables for all relevant states. Explore this demo application which exercises the functionality offered by the Action Bar and demonstrates how to theme it.


Tags : Android : Customizing the Action Bar, Android, Customizing the Action

Read More >>

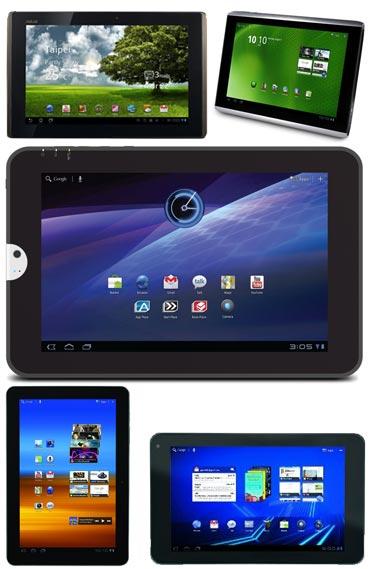
Android : PIX: Top 5 Android Honeycomb Tablets

Labels:

Android : PIX: Top 5 Android Honeycomb Tablets

So you think iPad is the best thing to happen to humankind since the invention of the wheel? Take a look at this year's best Android Honeycomb tablets that might just be up your alley.

Tablets have been around for a number of years now but it is only recently that they have risen to popularity. This is largely thanks to the Apple iPad released not so long ago.
Are you a gadget/gaming wizard? Would you like to write on gadgets, gaming, the Internet, software technologies, OSs and the works for us? Send us a sample of your writing with the subject as 'I'm a tech wizard' and we will get in touch with you.

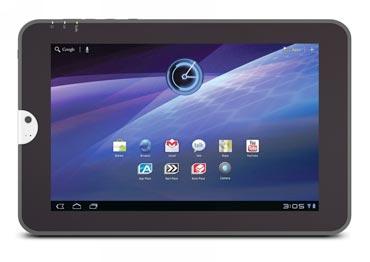
Toshiba Tablet

 The most celebrated aspect of the Toshiba is that it brings something to the table that the popular iPad 2 does not.

This includes a changeable battery, dual cameras, Flash support, as well as a number of extra data ports. It also appears to be one of the more durable devices of its type, having been made out of materials specifically resistant to the activities of daily life.
If you have been thinking of investing in your very own tablet then take a look at this year's top 5 Android Honeycomb tablets.


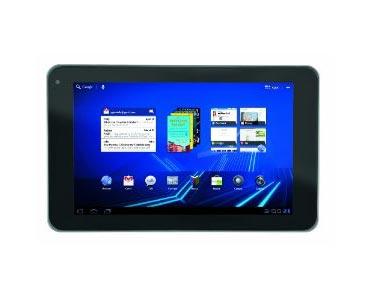
T-Mobile G-Slate


The T-Mobile G-Slate is one of those products that promises the world but doesn't really deliver much more than the average tablet.

On the other hand, it is one of the best in its price range. It features a slightly smaller screen display than competitors, but makes up for it in its better quality screen.

While the optional 3D camcorder was a good idea, many say it is not worth the price.

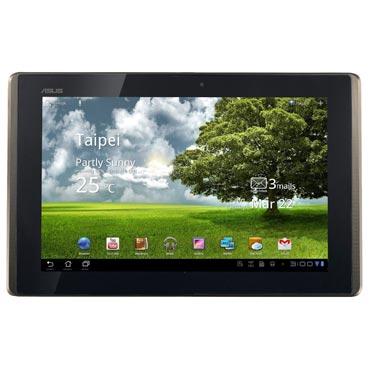
Asus Eee Pad Transformer

The IT world was wondering when Asus was going to come to the party.
After much anticipation it finally released the Eee pad transformer. Even though it is on the lower end of the price spectrum it has much to offer. It sports The Android 3 Honeycomb, a dual core processor and an entire 16GB of storage.
With the optional extras you can use your tablet for business by day, and transform it into an all-round entertainment device by night.


Acer Iconia Tab


The Iconia Tab from Acer is a pioneer in its price range, proving that you can get a device for all your needs at a fraction of the cost without compromising on quality.

As with its competitors, it is powered by the Android 3 Honeycomb and a Nvidia Tegra 2 processor.

Other great features are the 5MP camera, integrated LED flash, as well as GPS and Flash capability.


Galaxy Tab 10.1


The Galaxy Tab 10.1 was somewhat of a follow-up to the 7-inch tab which ran on 2.2 Froyo. This offering seems to be at the forefront of tablets and is giving iPad a run for its money.

It runs on Android Honeycomb 3, built to be sleek and streamlined, featuring an 8MP camera, 1280 800 resolution, and is extremely light.

These are the top 5 Android 3.0 Honeycomb tablets at the moment. They are each built to suit different lifestyles anywhere from the workaholic to the gaming enthusiast. These devices are at the top of their class, so if you are looking to add a tablet to your collection then think seriously about investing in one of these.

If you are aware of any other Android Honeycomb Tablets do share it with us, via the comments section.

Tags : Android : PIX: Top 5 Android Honeycomb Tablets, Android, Androis Honeycomb Tablets

Read More >>

Saying no to Encrypted Web Pages in Internet Explorer

Tuesday, August 16, 2011 Labels: ,

Saying no to Encrypted Web Pages in Internet Explorer

If you manage your finances or shop online, then you have probably had experience with using secure Web connections, otherwise known as SSL. These secure connections encrypt the data that is transferred from a Web server to your computer. Once the data gets to your computer, your browser has a special key that decrypts the information and displays it on your computer. During this process, when the file is decrypted, it is saved in the Temporary Internet Files
directory so that the browser can display it.

This default appears to be harmless because the Web page is only saved on your computer. If no one has remote access to your computer, the data would be safe, right? Not necessarily, because your data is now vulnerable to anyone who has physical local access to your computer. If that person is clever and lucky enough, he or she can sort through your Temporary Internet Files directory to find confidential information, such as your online banking information. All of this information is saved by default on your hard drive for anyone to look at. They do not even need to know your password or even log into your account on the bank's Web site, because a snapshot of the Web page is stored locally on your computer.

What can you do to protect your computer from this vulnerability besides setting up better computer security such as complex passwords? There is a cool feature of Internet Explorer that you just have to turn on that will eliminate the problem completely. Simply called Do Not Save Encrypted Pages to Disk, this feature, when enabled, will solve your problems. To enable it, follow these steps:

1. Open Internet Explorer.

2. Click Tools and select Internet Options.

3. Then, select the Advanced tab.

4. Scroll down through the list toward the bottom of the window until you see the Security section.

5. Locate Do Not Save Encrypted Pages to Disk, and check the box to the left of it.

6. Click OK to save and activate your changes.

Now you will no longer have to worry about pages that were encrypted being saved to your drive for anyone who has access to your computer to see.

Tags : Saying no to Encrypted Web Pages in Internet Explorer, Internet Explorer

Read More >>

Clearing temporary Internet files and cookies

Monday, August 15, 2011 Labels: ,

Clearing temporary Internet files and cookies

Every time you visit a Web site, the files for the Web page, such as the HTML and the images, are downloaded and stored in a temporary directory known as Temporary Internet Files. Over time, this directory can become full of images and HTML from various Web sites that you have visited. This directory can end up taking up a lot of space on your hard drive. Additionally, a user can browse your Temporary Internet Files directory and find out exactly what site you have been visiting just as if they were looking at your browser history. If you are concerned about your privacy, or just concerned about disk space, then clearing the Temporary Internet Files is a must.

Cookies are another item that is created on your computer when you visit a Web site. Contrary to popular belief, cookies are really not that bad. Most Web sites use them to save user data to a browser. One example of this is site preferences or automatic logon when you visit a Web site. The Webmaster of the Web site can detect if their Web site has already given you a cookie that has your user ID stored in it. If it finds one, then it knows exactly who you are and logs you on automatically. Advertisers also use cookies to store personal data. Instead of showing you the same advertisement 50 times, they use cookies to keep track of how many times an advertisement is displayed on your screen.

A common myth about cookies is that they allow Web sites to track other sites you visit. That is just not true. The only cost of having cookies on your computer is a privacy concern for local users. Any user that has physical access to your computer can browse to the directory that the cookies are stored and view what Web sites you visit because the cookies are named after the Web site that instructed your browser to put them on your computer.

Clearing the Temporary Internet Files and removing the cookies is a very simple task. Just follow these steps to clear these files:

1. Open up another copy of Internet Explorer.

2. Click Tools and then select Internet Options.

3. Under the Temporary Internet Files section, click the Delete Files button.

4. You will be prompted to confirm if you would also like offline files to be deleted. For maximum privacy, check the box and Click OK.

5. Once the files are erased, you will be shown the Internet Options screen again. Taking care of the cookies for your privacy is just as easy. Just click the Delete Cookies button.

6. Click OK on the confirmation screen.

7. Select OK once more to close Internet Options and you are done.

Now users will no longer be able to see what Web sites you visit from the cookies and Temporary Internet Files that are stored on your computer. Additionally, you will have freed up some disk space by deleting these files.

Tags : Clearing temporary Internet files and cookies, Internet

Read More >>

Clearing visited Web sites history

Labels: ,


Clearing visited Web sites history

Internet Explorer, by default, is configured to record all of the Web sites that you visit for a 30-day period. If you are concerned about your privacy, your browsing history should be cleaned frequently and history settings configured best for privacy. Doing so will ensure that any user of your computer will not be able to easily see what you have been doing. Keep in mind, however, that if you get rid of the browser history, you will eliminate the ability to use the history to go back to Web sites for which you might have forgotten the URL.

That use is really the only reason I can think of that makes the browser history useful. If you can live without that convenience, then follow these steps to clear your history from your PC:

1. Open up a copy of Internet Explorer by using either the icon on the desktop or on the Start panel.

2. Once Internet Explorer is open, click the Tools menu bar item and select Internet Options.

3. Then, just click the Clear History button.

4. Your history will now be cleared. Because you still have Internet Options open on your screen, adjust the amount of days that your browsing history is stored.

5. As mentioned earlier, the default setting for this value is normally 30 days. Highlight the number in the days to keep pages in history box and type in 0 to maximize your privacy.

6. Then, click OK to save your changes and exit the Internet Options screen.

After you have cleared your browser history and modified the history setting, your privacy will be much easier to protect.

Tags : Clearing visited Web sites history, Web Sites
Read More >>

Locking down Internet Explorer

Labels: ,

Locking down Internet Explorer

Now that you have removed all of the spyware and adware on your computer, let's turn off certain features of Internet Explorer so that you will be less likely to accidentally install more spyware. To get started, change the ActiveX install settings to prevent any new ActiveX apps to be installed. Follow these steps to change this setting:

1.Open Internet Explorer.

2.Click the Tools menu bar item and select Internet Options.

3.Click the Custom Level button on the Security tab.

4.Locate Download Signed ActiveX Control at the top of the list and select Disable.

5.Click OK and click Yes on the confirmation screen.

6.Select OK once more to close Internet Options.

A change in this setting can prevent you from installing new ActiveX controls from all Web sites, good and bad. If you ever run into some problem with a Web site not loading correctly, just re-enable this setting and try the site again.

Tags : Locking down Internet Explorer, Internet Explorer

Read More >>

Followers